Christmas Chocolate Truffles

IMG_3186

It’s beginning to look a lot like Christmas…. Well, given how late I’ve left it to write this, it doesn’t just look like Christmas, it actually IS Christmas.

I love Christmas. Winter’s my favourite time of year and Christmas is just the best bit. I like the presents, the decorations, the lights, the time off work (seriously, a sure sign of getting older must be that you look forward to the six days off just as much as the big day), the TV and especially THE FOOD.

Roast turkey, Mum’s bread sauce, mince pies, Wine Gums (if Nan’s staying), amazing leftover sandwiches, Jan’s Boxing Day chilli…. it’s all good. And giving food as gifts is fun, too.

I wanted to make a little foodie gift for all my work friends to go with their cards. Last year I gave everyone tiny decorated sponge cakes and I wanted to do something similar. I decided on chocolate truffles, decorated to look like mini christmas puddings. I made some last year and really liked how they turned out and it also meant that I could use my edible glitter, which is always a plus.

I found a recipe for chocolate truffles on the good old BBC Good Food website, which recommends using all dark chocolate, but I’ve used 125g dark chocolate and 175g milk chocolate, because I find that they can be too bitter.

I will admit, I’ve had to make this twice because I cocked up and forgot to buy butter so used Flora Buttery instead. I don’t know the science, but it seems that the truffles need the fat to set or something because the mixture just stayed really gross and slimy. So use full fat, it’s Christmas!

Christmas Pudding Chocolate Truffles

Makes about 40 truffles

For the truffles:

  • 300g good quality chocolate
  • 300ml double cream
  • 50g unsalted butter
  • Bitter cocoa, such as Bourneville or Green & Blacks

For the decorations:

  • 125g white chocolate
  • Holly sprinkles
  • Edible glitter
  • Gold petit-four cases
  1. Chop up your chocolate (I used a demi-lune knife) and pour into a large heat-proof bowl
  2. Gently heat the butter and cream until the butter melts and the cream starts to simmer
  3. Remove the cream mixture from the heat and pour over the chocolate
  4. Stir the chocolate and cream together until you have a smooth mixture
  5. Leave to set for around 3-4 hours

Once the mixture has set, you can start decorating!

  1. To shape the truffles, pour the cocoa into a medium sized bowl
  2. Take a walnut sized spoonful of truffle and roll in your hands to make a ball
  3. Drop the truffle into the cocoa and roll around to cover and then place in a petit-four case
  4. Melt the white chocolate in the microwave (much easier than a bain-marie) and then use a teaspoon to dot a tiny amount on top of the truffle, to make the cream on the pudding
  5. Finish by carefully placing some holly sprinkles on top and then dust over the glitter

I think you’ll agree, they’re pretty effective.

For the packaging, I had grand ideas. I wanted to put four or five into a clear plastic box, very simple and classy. I found the boxes by searching “clear plastic favour boxes” on eBay but it turns out I can’t count or measure though and I bought 35 boxes in totally the wrong size. I ended up just giving everyone one truffle in a little box on the day of our Christmas lunch when we wouldn’t want to eat much anyway. The single truffles actually looked really cute in their Christmassy boxes and made a nice little present to go with the cards.

So that’s that. Tree’s up, cards are written, presents are wrapped and gifts are made. We are ready for Christmas! Ha, not really, so much left to do! I hope everyone has a wonderful time over the holidays and if anyone finds themselves needing 25 favour cases, please let me know.

Merry Christmas!!

Clare xx

@ClareErin

IMG_3180 IMG_3186

Frimble Frumble

IMG_3046

I’ve been wanting to cook something Christmassy for the last week or so, but I couldn’t decide what to make. I know a gifty thing I want to make for friends, but it’s too early for that. Then it hit me, I’ll try and make Pret’s Crimble Crumble!

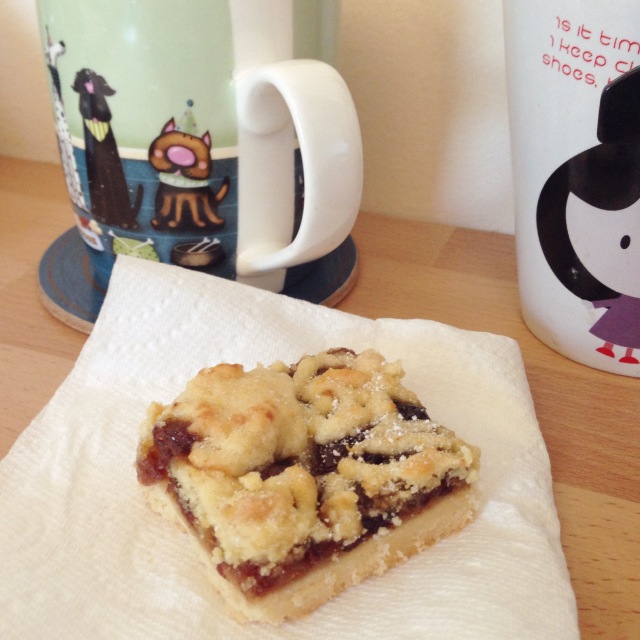
I LOVE Crimble Crumble. It’s a mince pie bar that’s shortbread with a layer of mincemeat and a crumble topping. It’s rich and lovely and, it turns out, quite easy to copy.

I’ve decided to call my own version Frimble Frumble, so we all know it’s a fake. I used Jamie recipes for the shortbread and crumble topping, but I used shop-bought mincemeat. It took most of Sunday to make, but its very easy, just a bit of a faff.

Frimble Frumble

Makes about 12-16, depending on how you’re cutting!

Part One, Shortbread (Taken from Cook with Jamie)

  • 250g plain flour, plus extra for dusting
  • 125g caster sugar
  • 250g unsalted butter
  • 125g cornflour or semolina
  • Preheat the oven to 150ºC
  1. Cream together the butter and sugar together until light and fluffy
  2. Add the flour and semolina and mix lightly with a spoon then your hands to make a dough
  3. Jamie recommends that you then roll it out on a floured surface before placing into prepared tin. I found this really tricky so I ended up putting the ball of dough into the tin and flattening it into place with my hands.
  4. Prick the dough all over with a fork and place in the oven for 50 minutes or until it’s golden
  5. Leave to cool completely in the tin.

Part Two, Mincemeat

  • 2 jars of any shop bought mincemeat (I used Co-Op, because we happen to live opposite one)
  1. Spread the mincemeat over the shortbread. That’s it!

Part Three, Crumble (Taken from the apple pie recipe in Jamie’s Dinners)

  • 225g plain flour
  • 140g unsalted butter
  • 85g caster sugar
  • Grated rind of 1 lemon
  • 2 egg yolks
  • Pinch of salt
  1. Preheat the oven to 180ºC
  2. Rub together the flour, butter, sugar, lemon and salt to make a sandy mixture
  3. Add the egg yolk and a dash of water and make a dough
  4. When the dough is smooth, wrap in clingfilm and put in the freezer for a couple of hours
  5. Once the dough is quite firm, take out the freezer and crumble over the mincemeat. I just pulled bits off the dough and scattered over, but I think next time I’d leave it longer in the freezer and then grate a layer over too.
  6. Put in the oven and cook for around 30 minutes. Keep a close eye on it though, as the time it takes to cook depends on the thickness of the crumble.

And its done! I sliced it into smallish squares and rectangles and took it to work for everyone to sample. It went down very well! It’s not *exactly* the same as the Pret version, I think that they use actual crumble rather than a pastry, but its still a nice take on a traditional mince pie. According to the Pret website, Crimble Crumbles are 330 calories per serving and I’d imagine Frimble Frumbles are about the same.

In other news… we got a cat! After 2 solid years of hints and flat out pleading, Jonny finally relented and we adopted a cat from a girl in Manningtree, who is having a baby and couldn’t look after her cats any more.

He’s a tabby boy called Ziggy and he’s very nearly a year old. I would love to put a photo on here to show how handsome he is, but he’s an antisocial sod at the moment and is living behind the sofa, under a radiator. He only seems to come out at night, to test out the acoustics of the house by wailing pitifully in every room. Still, all the (many, many) websites I’ve looked at and friends on Facebook say that this is normal and he’ll relax and make friends with us soon, so I’m not too worried. A little friend for Christmas, yay!

Clare xx

@ClareErin
IMG_3043

IMG_3045

IMG_3046

Blueberry & Lime Drizzle Cake

IMG_2887

When it’s cold and rainy out like it is now, I really just want to stay in and eat cake.

Actually, even when it’s gloriously sunny out, I still just want to stay in and eat cake.

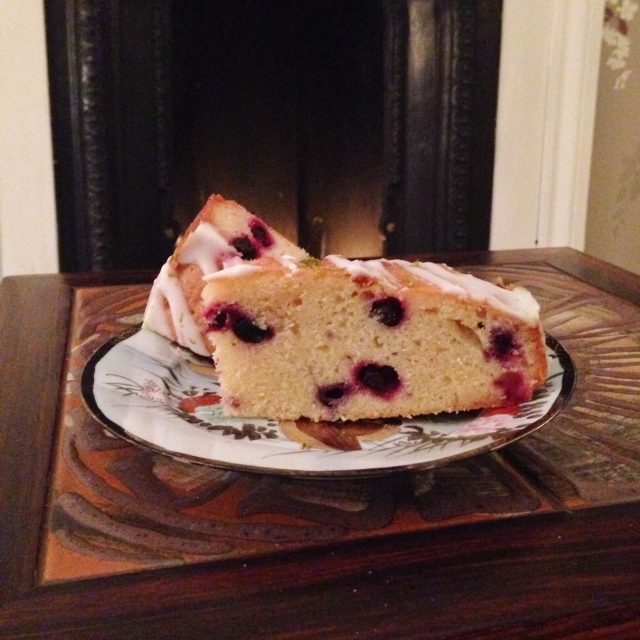
This is one of my favourite cakes, it’s a Lorraine Pascale recipe, ripped out of a Sainsburys magazine years ago. It’s very easy to make and decorate, but looks quite impressive. It’s a bit of a “village fete” cake, looks pretty in a rustic kind of way and because it’s a drizzle cake, it slices really cleanly. That’s important to me! It also lasts longer than other cakes because it’s so moist.

I made this yesterday without checking if I had all the ingredients and obviously I was missing some bits, so I had to make a few adjustments. I used half caster and half soft brown sugar, and the butter was a mixture of Stork, Lurpak and actual butter. It turned out just fine. This cake is so hard to get wrong!

Lime & Blueberry Drizzle Cake

Makes about 12 slices

For the cake:

  • 225g butter
  • 250g caster sugar
  • 4 large eggs
  • 250g plain flour
  • 1/2 tsp baking powder
  • 200g blueberries
  • zest of 1 lime

For the drizzle:

  • Juice of 2 limes
  • 100g icing sugar
  1. Preheat the oven to 180ºC
  2. Cream together the butter and sugar with an electric hand whisk, or in an electric mixer, until light and fluffy.
  3. Add the eggs one at a time, mixing in between.
  4. Fold in all but one tablespoon of the flour, baking powder and a pinch of salt.
  5. Toss the blueberries in the remaining flour, then fold these and the lime zest into the cake mixture.
  6. Spoon the mixture into a tin, and put in the oven for 50 minutes or until a skewer inserted into the thickest part comes out clean.
  7. Set aside to cool for 5 minutes or so.

To make the lime drizzle, mix together the juice of the two limes and of icing sugar. Poke holes in the top of the cake with a skewer or thin knife and then pour over the mixture. Leave for a few hours or overnight for the drizzle to sink in.

I iced the cake really simply by mixing together about 125g of icing sugar and 1 and a half limes, so the icing is thick and white but still runny. I then let it run off a spoon to make stripes across the cake and sprinkled over some lime zest to decorate.

According to MyFitnessPal, this cake is about 345 calories per slice. Not too bad! Keep it in a tin and it’ll be good for about 4 days. Enjoy!

Clare xx

@ClareErin
IMG_2880IMG_2881IMG_2893

Birthday Cake

photo 1

At work I have a reputation to protect. Not for being tough, or speaking my mind or even being particularly good at my job. Without even trying, simply by turning up one day in a big skirt with a satchel, I am the office girly girl.

I have a pink lunch box, Hello Kitty tissues and once announced that I always used limes instead of lemons because limes are ‘a prettier colour.’ I run to the window whenever we hear horses outside (always for a funeral, so I must look like a death-obsessed goth to the offices over the road). I have also been limping for over a week because I chose pretty, spotty trainers instead of actual, functional running shoes. See, not particularly clever but definitely girly.

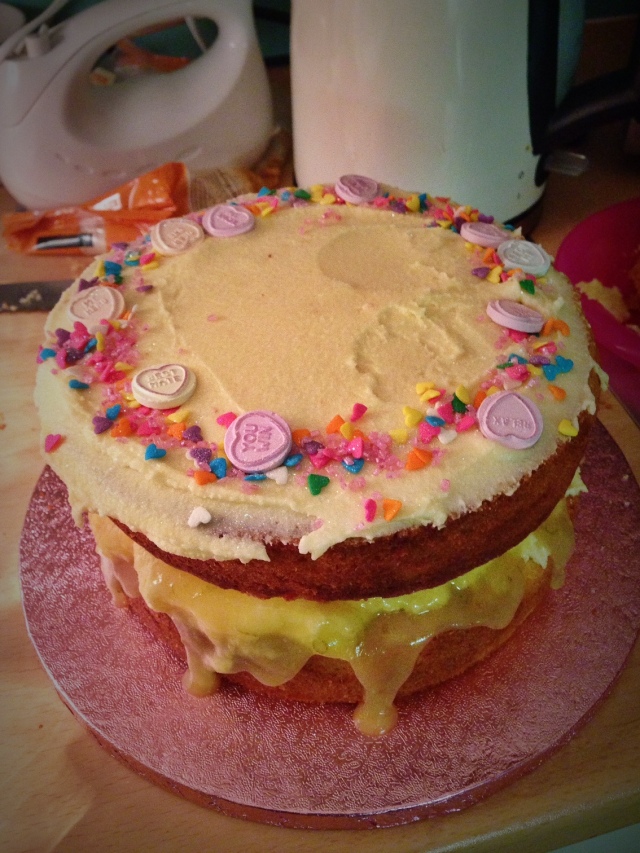
So when it was my birthday last week (thirty-one, thank you very much) I had to a make a cake that lived up to my girly reputation. I decided to make a big, traditional lime (obvs) sponge with a buttercream and lime curd filling, using a tried and tested Nigella madeira cake and a curd recipe I found online.

Lime Madeira Cake (Adapted very slightly from Nigella’s How to be a Domestic Goddess)

Double the amounts to make the 2 cakes

  • 240g unsalted butter
  • 200g caster sugar
  • Grated zest & juice of 1 lime
  • 3 large eggs
  • 210g self-raising flour
  • 90g plain flour
  1. Preheat the oven to 170ºC/gas mark 3/325ºF.
  2. Cream the butter and sugar, and add the lemon zest
  3. Add the eggs one at a time, with a spoonful of flour for each
  4. Gently mix in the rest of the flour and lime juice
  5. Pour into a cake tin and bake for about an hour, or until a skewer comes out clean
  6. Cool in the tin before turning out onto a cooling rack

I baked the two sponges in springform tins and when the cake was put together it was ENORMOUS. So big that when there was a wedge left it collapsed under it’s own weight and had to be thrown away. So maybe use regular Victoria Sponge tins?

Lime Curd (Taken from BBC Good Food website)

  • 112g plus 1 tsp golden caster sugar
  • 25g cold unsalted butter cut into pieces
  • 2 large eggs, lightly beaten
  • Juice of 2 limes
  • Freshly grated lime zest of 1 lime

Method

  1. In a heavy saucepan cook the sugar, butter, eggs and lime juice over a moderately low heat. Whisk frequently, until it is thick enough to hold marks of whisk, about 12-15 minutes.
  2. Immediately pour the curd through a sieve into a bowl. Stir in the zest of one lime and cool.

I think I scrambled my curd quite badly but once it went through a sieve it was absolutely fine, but I think I’d do it over a bain marie when I make it again just to make sure it stayed smooth.

But how to girly up such an enormous cake? I saw a beautiful cake on Instagram made by Emma from A Beautiful Mess and decided to base it on that. The main thing that went wrong with this plan is that the cake I was copying had frosting all over and piping on top, but I only bought one tub of buttercream so could only do a layer inside with the curd and some on top (as I’ve mentioned before, I DO NOT make frosting). I decided that the filling showing and the curd oozing out looked a bit country-cottage anyway.

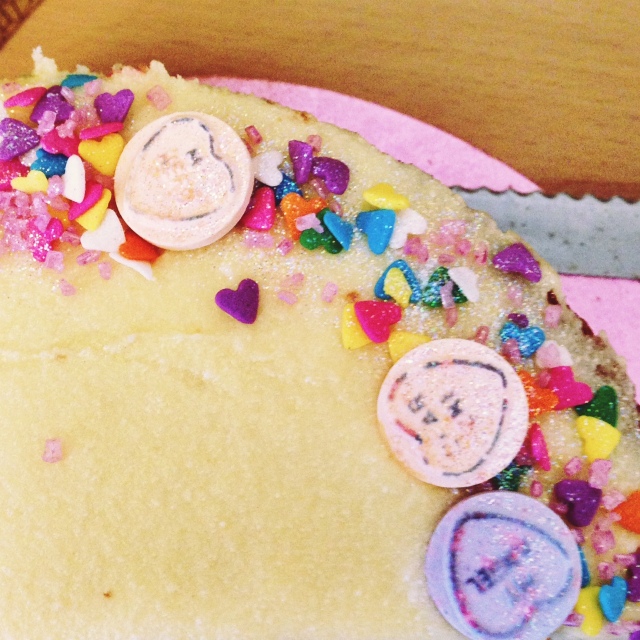
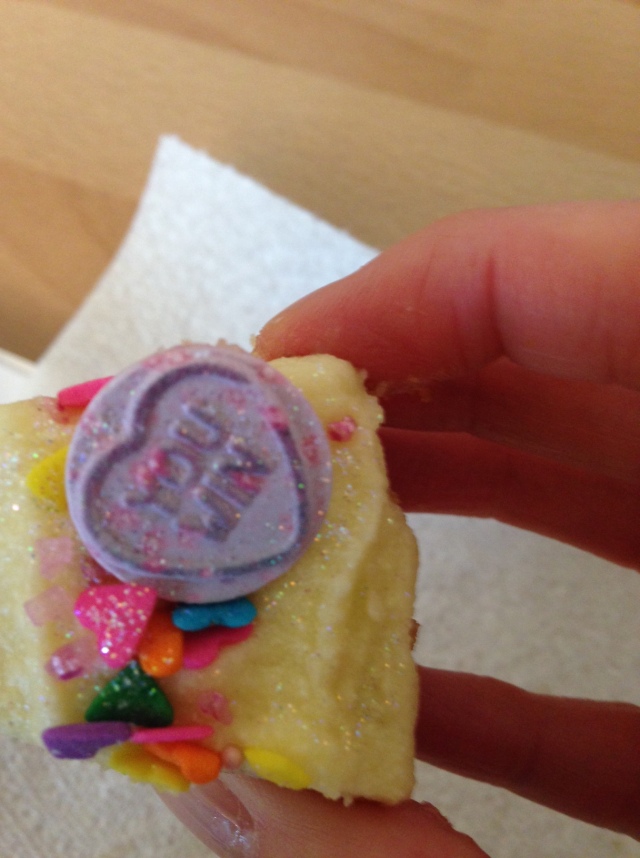
To make the cake look really Disney-princess, I scattered heart sprinkles and pink sugar around the edges of the cake and then dotted Love Hearts randomly. I finished with some edible glitter and put it on a pink cake board. Finished!

I text a photo of the final cake to my mum and she described it as the “campest thing I’ve ever seen.” She may have a point.

You might notice that there’s no photos of ingredients or the making of the cake. This is because all the lights in the kitchen died at once and we’re now cooking by lamplight like squatters, which is annoying. But that doesn’t matter because we are moving! To a house with stairs! As much as I love this flat; it’s the first place I’ve lived properly alone and I really love the big rooms here, it is exciting to be moving to a new place. But it does mean the next couple of weeks will be full of cleaning, polyfilla and paying out lots of money, it seems. Moving house is expensive! It will definitely be worth it though.

photo 3 (1)
photo 1
photo 2

Apple and Oatmeal Biscuits

market

I don’t exactly keep it a secret that I love Chelmsford market.

It’s based under a huge (terrifying) multi-storey carpark and it’s a proper old school market that sells everything you’d expect: second-hand bikes, plants, fake perfume, pick & mix sweets, haberdashery and a surprising amount of people willing to thread your eyebrows for a fiver. There’s also a great cheese stall and a butchers where last weekend I got shoulder of pork and some extra crackling for just £7.50. Market shopping is just friendlier than normal shopping and not just because it’s usually full of chatty old people (the elderly love me). Another big plus is that it’s SO CHEAP.

My absolute favourite stall is Steve’s Wholefoods, right at the back between the pet stall and the key cutters (see? Everything!). This stall sells any spice, grain, seed, nut or dried fruit that you can think of, as well as extras like manuka honey, green teas or super-hot tomato ketchup. It’s all much cheaper than a supermarket and as you buy in weights, you can get as little or as much as you want.

And now Steve’s Wholefoods has got even better- he’s started to put out free recipe cards, for cakes and biscuits using ingredients that you buy on the stall. They’re even laminated. Great idea!

I grabbed a card the other week for the recipe below, Apple and Oatmeal biscuits.  I made these on Tuesday night to eat during the Great British Bake Off (team Kimberley) and they went down a storm. I followed the recipe exactly, except I added a cup of sultanas in with the apples, because everything is improved with sultanas, don’t you think?

Apple Sultana and Oatmeal Biscuits

  • 1 cup of butter
  • 1/2 cup white caster sugar
  • 1 cup brown sugar (I used soft light brown)
  • 1 tsp vanilla extract
  • 1 1/2  plain flour
  • 2 tsps ground cinnamon
  • 1 tsp baking powder
  • 3 cups porridge oats
  • 1/2 cup dried apple, chopped finely
  • 1 cup sultanas
  • ingredients

Method

  1. Heat the oven to 180 degrees.
  2. In a large bowl, cream together the butter and sugar, then stir in the egg and vanilla.
  3. In separate bowl, sift together the flour, cinnamon and baking powder.
  4. Gradually add the flour mixture to the butter and sugar, mixing well.
  5. Stir in the porridge oats and dried fruit, making sure it’s properly mixed in.
  6. Arrange small dollops of batter on a lined baking sheet, making sure the biscuits aren’t going to touch when cooked. I got 9 to a sheet.
  7. Bake for 8 to 10 minutes, then take out and move to a wire rack to cool.

These are the first successful biscuits I’ve ever made, I think the trick is to take them out as they’re just starting to colour, but still seem a bit raw in the middle. They should last around a week in an airtight container (or pretty biscuit tin!) but, as they’re pretty soft to begin with, a little staleness won’t hurt them.

A few points:

  • These are really cheap to make, I bought the sugar, apples and sultanas in the market, which came to about £2.00 for the lot.
  • About 125 calories a biscuit.
  • This recipe makes LOADS of dough; I made about 25 smallish biscuits and I had dough left to keep in the freezer for next time.
  • Dried apple is really hard to cut with a normal knife, either try and buy it already chopped, or maybe cut them with a demi-lune knife?
  • Don’t get your eyebrows threaded at the market, go to Superdrug on the High Street instead.

Enjoy!!

mixture
photo 3

Reece’s Pieces Cupcakes

photo

I have to be honest, I was a bit over cupcakes.

Like calling things ‘shabby chic’ or behaving like you’re the first person to ever like cats, cupcakes had, in my opinion at least, got a bit twee and overdone. And as a general rule, if a thing becomes a common name for second-rate burlesque dancers, stop eating that thing.

They’re big, obnoxious, gaudy things. The Rihanna of cakes, if you will. Give me a nice slice of drizzle cake over that any day. Or so I thought…

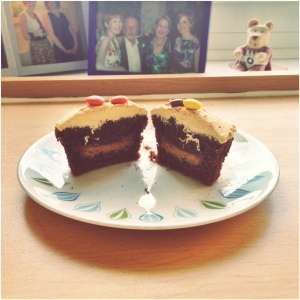
Ever since my sister returned from her honeymoon in New York earlier this year with chocolatey gifts, I’ve been slightly obsessed with Reece’s peanut butter cups and I really wanted to try cooking with them. I’d seen a few cheesecake recipes that replicate the Reece’s flavours, but when I saw a photo on Twitter of some cupcakes using the actual chocolates, I thought they would be worth trying to reignite my cupcake love!

I found this recipe online at www.mission-food.com and I can honestly say that they are some of the easiest but most effective cakes I’ve ever baked. The sponge isn’t too sweet and is lovely and chocolatey. Highly recommended.

Reece’s Pieces Cupcakes (makes 12)

  • 90g plain flour
  • 30g plain cholcolate cocoa (I used Bournville)
  • 1/2 tsp bicarbonate of soda
  • 1/8 tsp baking powder
  • Large pinch of salt
  • 55g butter or margerine
  • 90g caster sugar
  • 1egg
  • 1/2 cup milk
  • 12 Reece’s peanut butter cups

photo-2

Method

  1. Heat the oven to 180 degrees and line a muffin tin with 12 muffin cases
  2. Sift together all the dry ingredients except the sugar
  3. By hand or with a mixer, beat together the sugar and butter until smooth, then add the egg
  4. Fold in half the dry ingredients to the butter mixture. Add the milk, then stir in the remaining flour mix. Stir until smooth
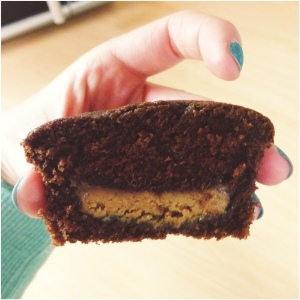
  5. Add a spoon of the batter to each muffin case (WRAPPERS OFF!), then place a peanut butter cup on top. Spoon the remaining batter into the cases. Watch out with this bit, I put way too much batter underneath the peanut butter (I got my spoons confused!) and then had to kind of push them in to cover them. This batter makes 12 cupcakes precisely, no room for error!
  6. Pop in the oven and bake for about 20 minutes, until they spring back when touched. Leave to cool completely

When the cakes are cooled, you can ice them.

The recipe I used also had how to make the frosting, but I hate making frosting. It might be lack of fancy equipment (I make everything with an ancient Tesco value hand mixer) but I’ve never made successful frosting; it’s always either to hard and buttery or mix it 2 seconds too long and it turns to rank liquid. The recipes are always for waaay too much too, which I always feel too guilty to chuck out.

photo(8)

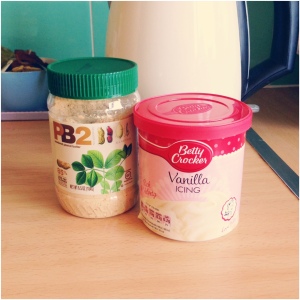
So for these cakes I decided to buy Betty Crocker vanilla frosting and stir in some powdered peanut butter I’d bought for another (less successful) recipe. This plan actually worked really well, as it gave the cupcakes a sweet topping, which is nice against the dark chocolate sponge and salty peanut layer.

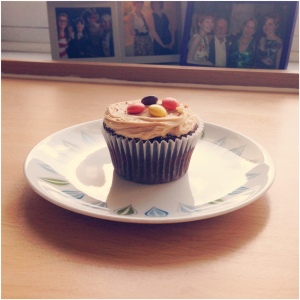
As you can see from the photos, I’m not the best at frosting but I gave it my best shot! I decorated with some Reece’s Pieces, which I hated and would recommend using peanut butter M&M’s instead.

A few points:

  • With the frosting, decorations and peanut butter cups, these are not particulary cheap cakes
  • These cakes work out to about 275 calories each. Worth it!

And there you go- Reece’s Pieces Cupcakes! My love of cupcakes is restored!

photo(6) photo(7) photo(9)